
If you want to do a 2.4 swap on your neon, hopefully this how-to will guide you in the right direction. These are not installation instructions, so it is recommended that you have a service manual on hand for proper procedures.
Generic Parts List:
1) 2.4L DOHC engine from 95-02 Chrysler Products
2) 2.0L DOHC Intake manifold
3) 2.0L DOHC exhaust manifold (stock or aftermarket)
4) 2.0L DOHC Heater hose hard pipes
5) 2.0L DOHC PCM (Stock, Mopar, or AFX)
6) 2.0L DOHC Wiring harness
7) 2.0L Crankshaft pulley (Some 2.4's will require the use of a 2.0L UDP)
8) 2.4L Motor mount adapter
9) PT Cruiser water pump output neck
10) 2nd Gen Neon fuel pressure regulator (58psi) OR 24lb. injectors (one or the other)
11) PT Cruiser alternator brackets
12) DOHC Hood
13) 2.4L Stratus motor mount

Notes before you start:
- 01+ engines will have different head ports than earlier engines, so be aware of this when selecting an engine.
- Do not attempt this swap if you do not plan to use a torque wrench or have no idea what a torque wrench is.
- The 2.0L DOHC head and 2.4L DOHC head are the same except 2003 and later heads.
- Aftermarket 2.0L cam gears will not work on a 2.4L unless they are spaced forward properly.
- You can use 2.0L DOHC cams in a 2.4L to gain more power, however you must flip the intake cam magnet 90 degrees.
- You cannot use an 03 or higher model year 2.4L because they use the NGC crank trigger. NGC is not compatible with the neon's PCM.
Always take the necessary safety precautions when working or your vehicle.
Step 1: Prepping the Car
Remove the radiator, condenser, and fan(s)
Remove the 2.0L engine and transmission
Clean the engine compartment
Step 2: Prepping the 2.4L engine
-On the 2.4L engine do the following:
Remove the power steering pump and brackets (on PT engines, you will re-use the brackets)
Remove the intake manifold
Remove the plastic water pump output neck (do not remove on PT engines)
Remove the alternator and brackets (on PT engines, you will re-use the brackets)
Remove the exhaust manifold
Remove the flexplate or flywheel
-On the 2.0L engine do the following:
Separate the 2.0L engine and transmission
Remove the power steering pump
Remove the intake manifold (DOHC)
Remove the alternator
Remove the exhaust manifold (DOHC)
Remove the flexplate or flywheel and clutch
-On the 2.4L engine do the following:
Install the 2.0L sensors. There is a variety of sensors from different models and years found on both engines. I just assume use the 2.0L sensors if they were working properly to avoid confusion. If you had a SOHC, you must use the DOHC camshaft position sensor, TPS, and IAC. You will have to change the position of the knock sensor on the 2.4L. It sits high in the block and interferes with the 2.0L intake manifold. Move it to a lower spot on the block (how it is on the 2.0L) or you can cut off the support bar that it hits on the manifold.
Install the PT water pump output neck
Install the 2.0L DOHC heater hose hard pipes
Install the 2.0L DOHC intake manifold
Install the 2.0L DOHC exhaust manifold (you may want to wait until the engine is in the car before you do this)
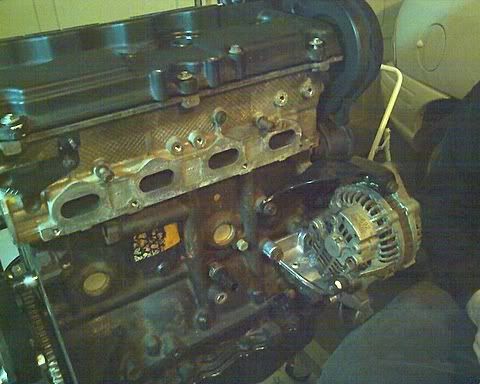
Install the PT alternator brackets and 2.0L alternator
Install the PT power steering brackets
Install the 2.4L mount adapter
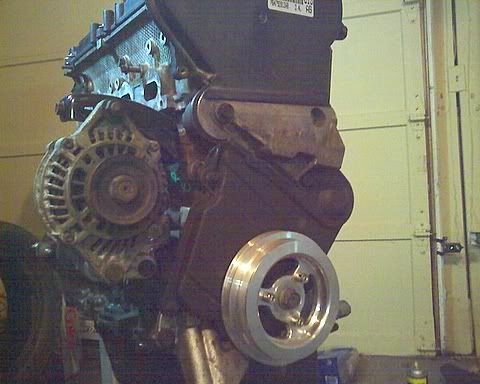
Install the 2.0L crankshaft pulley. Some engines will have a clearance issue with the stock 2.0L pulley hitting the oil filter neck. If this is the case, you must use an UDP.
Install the 2.0L flexplate, or flywheel and clutch. Note that the bolt holes will only line up one way.
Install the modular clutch on the transmission
Install the transmission onto the engine
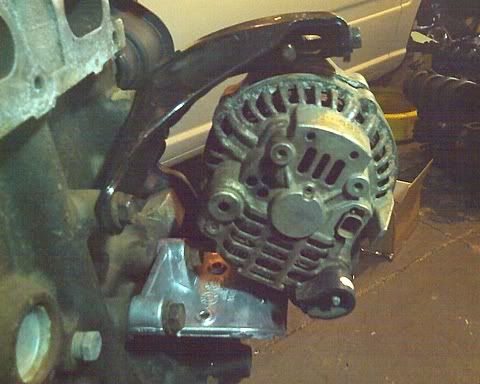
PT alternator brackets and 2.0L alternator
2.4L Mount Adapter
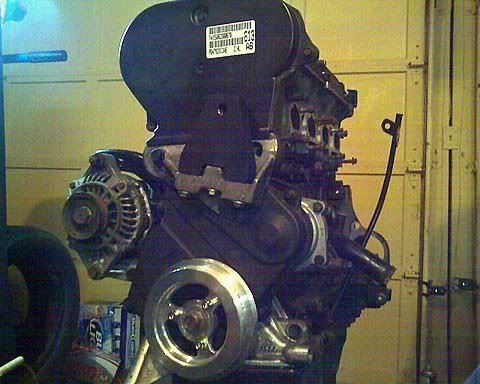
2.0L Under Drive Pulley
Step 3: Modifying the Front Motor Mount
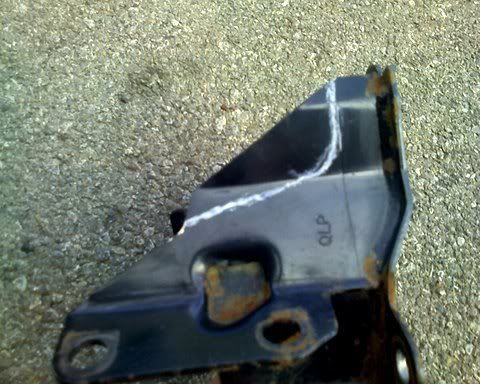
You must use the front motor mount (FMM) from the neon. This, however, does not want to fit well on the 2.4L. You will have to modify the mount a little to get it to fit. To do this, remove material from the mount to make it fit. There isn't much to remove, just enough to allow the mount to clear the 2.4L's oil pan.
The white line is where the FMM should be cut
Step 4: Installing the Engine and Transmission
Install the engine and transmission into the car.
Bolt in the engine mount and transmission mount.
If you used a modular clutch, install and tighten the clutch to flexplate bolts. Torque to spec!
Install the clutch inspection cover
Install the modified FMM to the engine and transmission.
Install the bobble strut.
Install shift cables.
Install the axle shafts.
Install the exhaust manifold if you left it off.
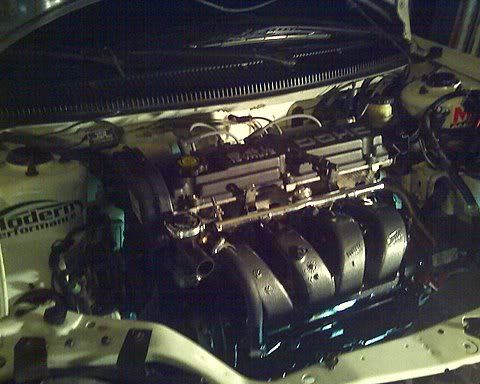
2.4L installed in a '98 neon
Step 5: Modifying the Wiring Harness
There are just a couple of modifications you have to make to the harness.
There are two ways to do this. You can modify the harness connectors, or modify the wires at the PCM connection. I will outline how to modify the harness connectors. Do some research if you would like to do it the other way.
The coil pack connector has three wires. The middle one is the common 12V supply to the coils. It should be green with an orange tracer. Leave this wire alone. You need to switch the two outside wires. To do this, you must pull the pins out from the back of the connector. You must release the pins first, DO NOT pull the pins out without releasing them first.
The last modification is the injector connections. The #2 injector needs to be connected to the injector #1 plug on the harness. The #3 injector needs to be connected to the #2 plug. The #4 injector needs to be connected to the #3 plug. The #1 injector needs to be connected to the #4 plug. To do this lengthen the wires of the #4 plug so that they reach the #1 injector.
Install the wiring harness if you have not done so already.
Personally, I feel its easier to change the terminals at the PCM connector, but if you have no experience with terminal disassembly it may be difficult.
You can use a SOHC harness, however it will involve more modifications.
Step 6: Fuel Pressure Regulator
Since the 2.4L is a bigger engine and you are controlling it with a 2.0L computer, it needs more fuel than the 19lb injectors will provide. This is the reason you must use 24lb injectors OR a 58psi fuel pressure regulator. If you are installing a mostly stock 2.4 with some bolt-ons, I would recommend using the 2nd gen neon 58psi regulator. 2.4's with bigger cams and a lot of bolt-ons should use the 24lb injectors.
If you are using the 58psi regulator, install it now. The regulator is located on the fuel pump canister.
Step 7: Power Steering
Update: Modern Performance now sells a PS bracket for 2.4L swaps.
Setting up the power steering is a little tricky. There are a few different ways to do this.
If you purchase an 01 PT Cruiser power steering pump bracket, it will bolt onto the 2.4. You must remove the large bracket attached to the pump. The problem is that once the pump is bolted on, it sits 1/2 inch to far in. To solve this problem, you will have to make some sort of spacer to go between the pump and the PT bracket. The two outside holes on the PT bracket will have to be slotted to allow for belt adjustment.
Ive also heard of people using an SRT-4 bracket, but I cannot confirm that it works. I do know that the pump will sit at a backwards angle, but this should not affect pump operation. The advantage of the SRT bracket is that you don't need a spacer.
Either way you go, you should invest in a DOHC neon power steering high pressure line. The SOHC line is too short to fit around the 2.4 head. You will also need a DOHC neon power steering reservoir.
SRT-4 Internals and SRT-4 Turbo
It has become very popular to use SRT-4 internals (pistons and rods) in the N/A 2.4's. The pistons and rods will fit and bolt in with no issues (assuming the block is in good condition). You cannot use the SRT crank as it is equipped with the 32 tooth reluctor wheel for the NGC crank trigger.
If you plan to rev the engine at high RPM, you should have the crank re-balanced and have the weight of the new pistons and rods matched. Balance is one of the most important factors of building a high revving engine, so do not compromise this.
Remember that the SRT internals will yield a lower compression ratio, so they are best suited for forced induction.
If you choose to use the SRT turbo, the install will be basically the same as the 2.0 DOHC.
SRT-4 engine swap
The SRT-4 engine will bolt in basically the same as the N/A 2.4, however there are some major differences in swapping the two. The most difficult issue with swapping the SRT-4 engine is the engine management. You cannot run an SRT-4 engine on the neon's PCM because the SRT-4 engine uses the NGC crank trigger. In order to run the engine, you must use an SRT PCM or run a full stand-alone. This is not as easy as it may sound. There are a handful of people who have successfully done the swap, but not without hours of research and work.
-------------------------------------------------------------------------------------
Enjoy your car's new-found torque!
If you have any suggestions or corrections, feel free to PM me. Constructive criticism is always welcome.
- Jason


